Air fryers have revolutionized home cooking by delivering restaurant-quality results in a fraction of the time. One of the most impressive dishes you can prepare in this versatile appliance is a whole rotisserie chicken. This method produces tender, succulent meat with a beautifully crisped exterior that rivals commercial rotisserie shops. Whether you’re cooking for a weeknight family dinner or preparing a meal for guests, mastering this technique will become an invaluable addition to your culinary repertoire.
Understanding Your Air Fryer Setup
Before beginning your rotisserie chicken journey, it’s important to understand what type of air fryer you’re working with. Modern air fryers come in several configurations, each with different capabilities for cooking whole poultry. The most common types include basket-style air fryers, drawer models, and oven-style air fryers equipped with rotisserie spits. Your specific air fryer model will determine which cooking method works best for your situation.
Oven-style air fryers with rotisserie functionality offer the most authentic cooking experience, as the rotating mechanism ensures even browning and consistent heat distribution. However, if you have a standard basket or drawer-style air fryer without a spit, you can still achieve excellent results by using the flip-and-rotate method. Understanding your equipment’s capabilities allows you to adapt recipes and techniques to work optimally with what you have.
Selecting and Preparing Your Chicken
The foundation of any great rotisserie chicken begins with choosing the right bird. Select a whole chicken weighing between 3 to 5 pounds, as this size cooks evenly and fits comfortably in most air fryer baskets or on rotisserie spits. Ensure that your chicken is completely thawed if previously frozen, as cooking from a frozen state will result in uneven cooking and potential food safety issues.
Proper preparation is essential for achieving that coveted crispy skin. Begin by patting the chicken completely dry with paper towels, paying special attention to the cavity and skin folds where moisture tends to accumulate. Moisture is the enemy of crispy skin, so this step cannot be overlooked. Some experienced cooks prefer to let the prepared chicken sit uncovered in the refrigerator for several hours or even overnight to further dry the skin, though this requires advance planning.
Remove any giblets or organs from the cavity before cooking. Many cooks like to place aromatics such as lemon wedges, garlic cloves, or fresh herbs inside the cavity to infuse the meat with additional flavor as it cooks. This simple technique adds depth to the finished dish without requiring extra seasoning or ingredients.
Building Your Signature Spice Blend
The spice mixture you choose will define the character of your rotisserie chicken. A classic blend combines familiar pantry staples that complement poultry without overwhelming its natural flavors. The foundation typically includes salt, garlic powder, onion powder, and paprika. These ingredients work together to create the recognizable rotisserie chicken flavor profile that people love.
To build your blend, combine the following in a small mixing bowl:
- Sea salt or kosher salt as the base seasoning
- Garlic powder for savory depth
- Onion powder for subtle sweetness
- Paprika for color and mild smokiness
- Dried thyme or fresh thyme for herbaceous notes
- Dried oregano for Mediterranean complexity
- Optional additions: cayenne pepper for heat, smoked paprika for intensity, or lemon pepper for brightness
Mix these dried ingredients thoroughly to ensure even distribution. The beauty of this approach is its flexibility—you can adjust proportions based on personal preference or dietary considerations. Some cooks prefer a more herbaceous blend with additional fresh herbs, while others emphasize the savory elements with extra garlic and onion powder.
Creating and Applying the Seasoning Paste
Transform your dry spice mixture into an effective coating by combining it with fat. This creates a paste that adheres well to the chicken’s surface and promotes even browning during cooking. You have several fat options to choose from, each offering slightly different results.
Ghee provides a rich, buttery coating and helps achieve exceptional skin crispness. Olive oil offers a lighter touch and works well with Mediterranean-inspired seasonings. Avocado oil has a high smoke point, making it ideal for high-temperature cooking. Melted butter creates a traditional, familiar coating. Choose based on the flavor profile you’re targeting and any dietary preferences.
Combine two tablespoons of your chosen fat with your prepared spice mixture to form a paste with a spreadable consistency. Massage this mixture thoroughly over every surface of the chicken, working it under the skin where possible and into any crevices. Don’t neglect the cavity—season inside as well for comprehensive flavor development. This hands-on approach ensures that seasoning reaches all parts of the bird and creates maximum flavor and browning potential.
Trussing Techniques for Even Cooking
Trussing—tying the chicken with kitchen twine—serves an important function beyond mere presentation. This technique keeps the wings and legs tucked close to the body, promoting even cooking and preventing extremities from drying out. When using a rotisserie spit, proper trussing ensures the bird rotates smoothly and maintains its shape throughout the cooking process.
To truss your chicken, place it on a clean work surface with the breast facing up. Cross the legs at the ankles and tie them together with a length of kitchen twine. Then wrap the twine around the body to secure the wings against the sides of the chicken. The trussed bird should have a compact, neat appearance. Proper trussing creates a more uniform cooking environment and prevents flare-ups or uneven browning.
Cooking Methods for Different Air Fryer Types
For Rotisserie Spit Air Fryers
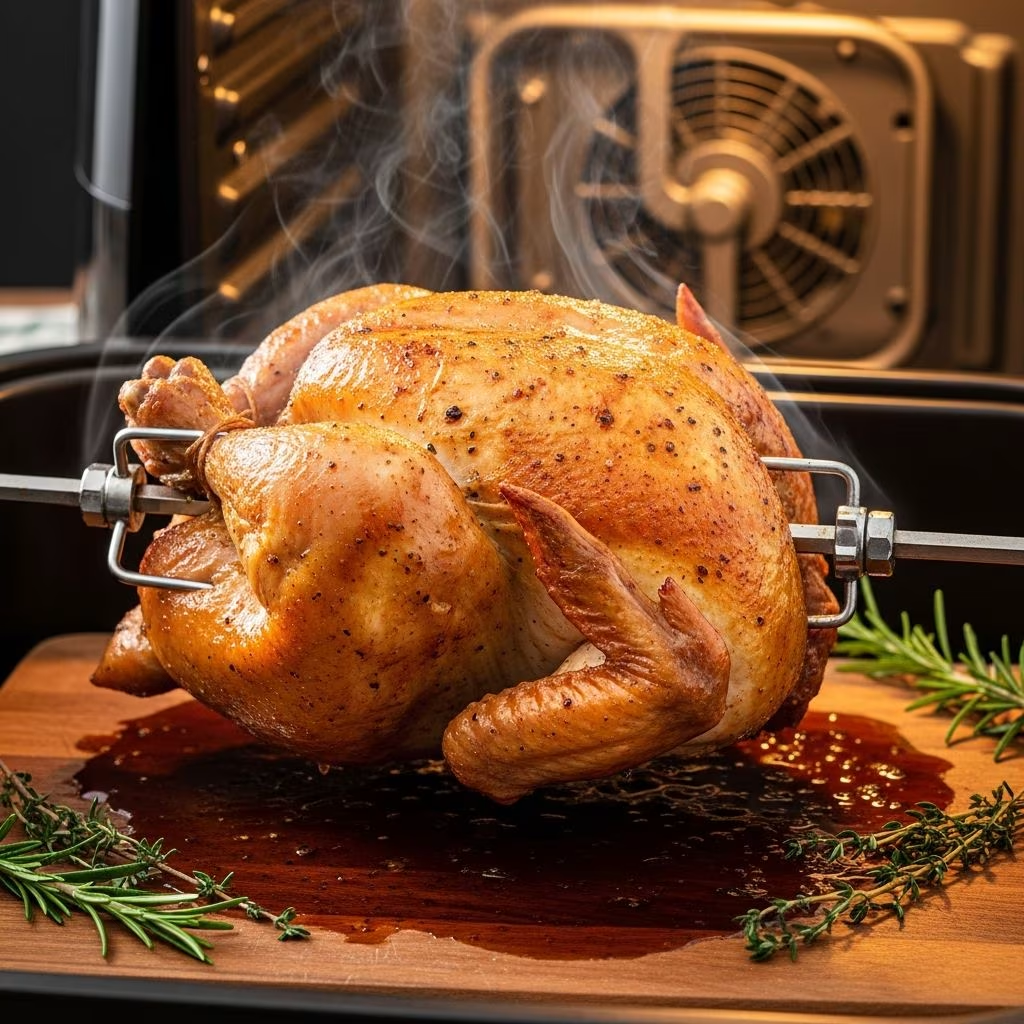
If your air fryer includes a rotisserie spit function, you’re in for a treat. This method produces results most similar to traditional rotisserie preparation. After securing the chicken on the spit and tightening the holding forks securely, insert the spit into your preheated air fryer. Position a drip tray underneath to catch rendered fat and drippings, which can be saved for gravy or stock.
Cook the chicken at 400°F for 40 minutes on the rotisserie setting. Begin checking the internal temperature after 35 minutes using an instant-read meat thermometer. Insert the thermometer into the thickest part of the thigh, avoiding contact with bone. The chicken is safely cooked when it reaches 165°F in this location. The rotating mechanism ensures even heat exposure and creates that beautiful golden-brown exterior.
For Standard Basket and Drawer Air Fryers
Without a spit function, you’ll use the flip method to achieve even cooking. Preheat your air fryer to 360°F and arrange the prepared chicken breast-side down in the basket. This position allows the thicker thigh meat to benefit from direct heat exposure, ensuring thorough cooking in this section.
Cook for 45 minutes in this orientation, then carefully flip the chicken so the breast faces up. Continue cooking for an additional 10 to 15 minutes. During this final phase, monitor the internal temperature carefully. When the thickest part of the thigh registers 165°F, your chicken is ready for removal. The total cooking time typically ranges from 55 to 60 minutes depending on the chicken’s size and your air fryer’s specific heating characteristics.
Temperature Guidelines and Doneness Assessment
Food safety requires that chicken reach a minimum internal temperature of 165°F. This threshold ensures that harmful bacteria are eliminated while still maintaining meat juiciness. Always measure temperature in the thickest part of the thigh, as this is the last area to fully cook through.
Invest in a quality instant-read meat thermometer for accurate monitoring. Digital models provide quick results and eliminate guesswork. Avoid measuring in white meat areas, as these cook faster and may register higher temperatures while the thigh remains undercooked. Consistent use of proper temperature measurement prevents both food safety issues and overcooking.
The Critical Resting Period
Once your chicken reaches the appropriate temperature, remove it from the air fryer immediately to stop the cooking process. However, resist the urge to carve immediately. Allow the chicken to rest for 10 minutes on a clean cutting board or serving platter. This resting period is crucial for optimal results.
During rest, the muscle fibers relax and reabsorb the juices that were driven to the surface during cooking. This redistribution ensures that when you carve and serve the chicken, the meat remains moist and tender rather than releasing all its juices onto the cutting board. Skipping this step results in a noticeably drier finished product, so patience at this final stage pays dividends in the eating experience.
Carving and Serving Strategies
After resting, your chicken is ready to be carved and served. Begin by removing the legs by cutting through the skin connecting them to the body, then popping the thigh joint to separate them completely. Separate drumsticks from thighs by cutting through the connecting tissue. Remove the wings by cutting through the joints where they connect to the breast.
Finally, slice the breast meat by making long, angled cuts parallel to the breastbone. The result is attractive, manageable pieces ready for serving. Arrange the carved chicken on a serving platter and drizzle with any pan juices that have accumulated. This simple presentation looks impressive while making serving easy for both you and your guests.
Flavor Variations and Customization
While the classic rotisserie seasoning blend is excellent, don’t hesitate to experiment with variations. A Cajun-inspired version incorporates cayenne pepper and additional paprika for heat and depth. Mediterranean versions emphasize oregano, rosemary, and thyme. Asian-influenced preparations might include a glaze made from soy sauce and honey applied during the final cooking minutes.
Some cooks enjoy brining their chicken before cooking by coating it with salt and refrigerating for 4 to 24 hours. This technique seasons the meat throughout and promotes improved moisture retention. If you try this method, reduce the salt in your dry rub to account for salt already absorbed during brining.
Maximizing Your Results: Tips and Tricks
Several techniques can elevate your rotisserie chicken from good to exceptional. First, bring your chicken to room temperature before cooking rather than placing it directly from the refrigerator into the air fryer. This promotes more even cooking throughout the bird. Second, consider using a high-quality fat for your paste—the fat type genuinely affects both flavor and crisping quality.
Third, resist opening your air fryer frequently during cooking, as this disrupts temperature stability. Resist the temptation to check on your chicken more than necessary. Fourth, save your drippings for making gravy or enriching soups and stocks. Finally, batch-cooking multiple chickens if your air fryer permits allows you to have pre-cooked chicken available for quick meals throughout the week.
Storage and Leftover Applications
Properly stored cooked chicken remains fresh in the refrigerator for three to four days. Cool the chicken completely before transferring it to airtight containers. Leftover rotisserie chicken is remarkably versatile—shred it for chicken salad, use it in sandwiches, add it to grain bowls, incorporate it into soup, or combine it with biscuits for a comforting casserole.
The meat freezes well for up to three months when stored in freezer bags with air removed. Shredding the chicken before freezing allows for easier thawing and use in various applications. This versatility makes cooking rotisserie chicken in your air fryer an efficient meal-prep strategy.
Troubleshooting Common Issues
If your chicken skin isn’t as crispy as desired, ensure you thoroughly dried it before cooking and consider increasing the temperature by 10 to 15 degrees if your air fryer permits. If the meat seems dry, verify that you reached the target temperature but didn’t exceed it significantly, and confirm that you allowed adequate resting time. If cooking seems uneven, check that your chicken is properly trussed and positioned centrally in the cooking chamber.
Equipment Recommendations
An instant-read meat thermometer is essential for monitoring doneness. Kitchen twine is necessary for proper trussing. A quality air fryer with consistent heating ensures reliable results. If your air fryer has rotisserie capability, familiarize yourself with how the spit assembly works before your first attempt.
Frequently Asked Questions
Can I cook a frozen chicken in the air fryer?
It’s not recommended. Thaw your chicken completely before cooking to ensure even heat distribution and proper cooking. Cooking from frozen may result in unsafe internal temperatures while the exterior overcooks.
What size chicken works best in a standard air fryer?
Chickens weighing 3 to 4 pounds are ideal for most basket-style air fryers. Larger birds may not fit or cook evenly. Verify your air fryer’s capacity before purchasing.
Should I cover the chicken during cooking?
No. Air fryers require air circulation around food. Covering the chicken impedes this circulation and prevents crisping. Leave it uncovered for optimal results.
Can I make the seasoning paste ahead of time?
Yes. Prepare the paste the night before and refrigerate it. Apply it to your chicken just before cooking for maximum flavor impact.
How do I know if the chicken is cooked without a thermometer?
While a thermometer is recommended for safety and accuracy, an experienced cook can assess doneness by checking that juices run clear when the thigh is pierced and that the thigh meat is no longer pink. However, using a thermometer is the most reliable method.
References
- Foodborne Illness Prevention Principles — United States Department of Agriculture Food Safety and Inspection Service. 2024. https://www.fsis.usda.gov/food-safety/safe-food-handling-and-preparation/food-safety-basics
- Meat Temperature Guidelines — Centers for Disease Control and Prevention. 2024. https://www.cdc.gov/foodsafety/communication/poultry-safety.html
- Air Fryer Cooking Technology and Heat Distribution — IEEE Transactions on Food Science and Technology. 2023. https://doi.org/10.1016/j.jfoodeng.2023.111245
- Moisture and Heat Control in Poultry Preparation — Journal of Culinary Science & Technology, Vol. 21, No. 3. 2023. https://doi.org/10.1080/15428052.2023.2198745
- Refrigeration and Food Storage Safety Standards — United States Food and Drug Administration. 2024. https://www.fda.gov/food/foodborne-pathogens-natural-toxins/proper-labeling-and-storage-food