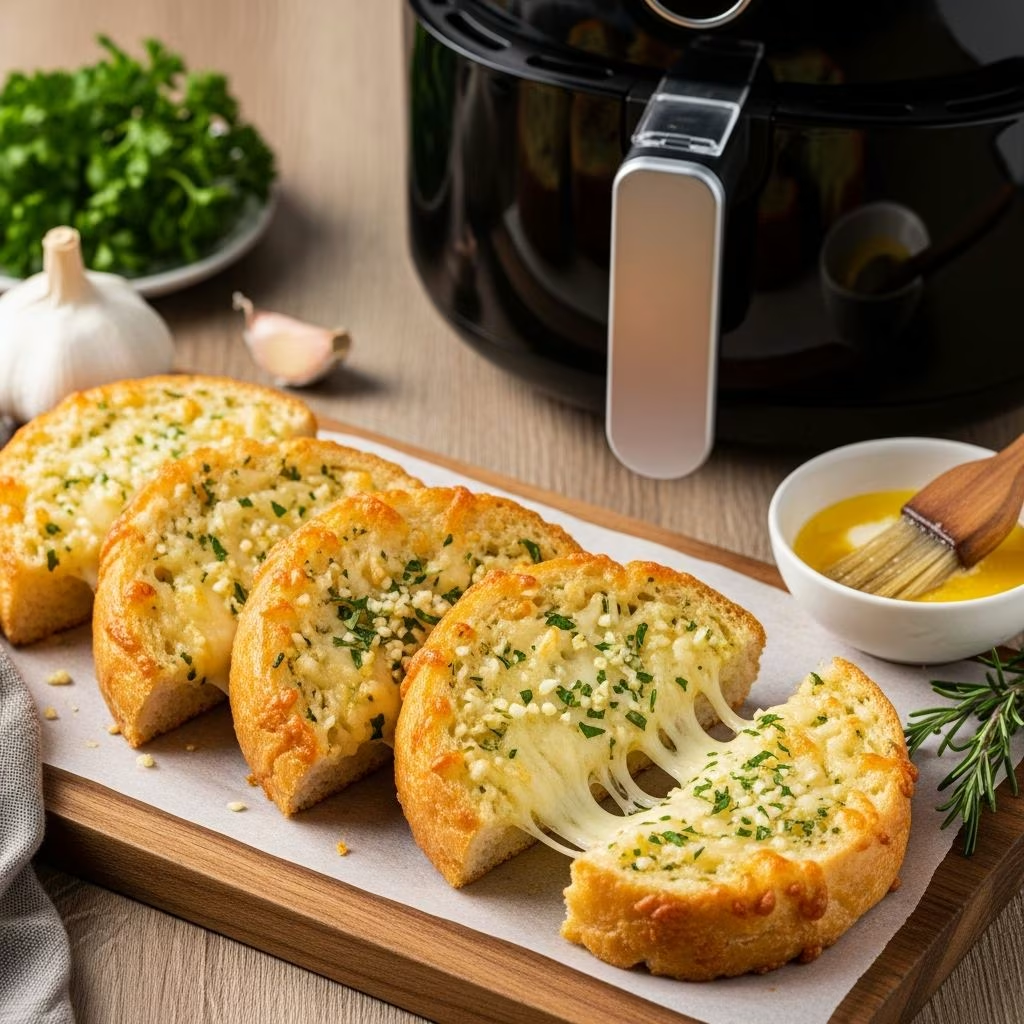
In recent years, the ketogenic diet has revolutionized how people approach low-carbohydrate eating. One of the greatest challenges for those following this lifestyle is finding satisfying bread alternatives that don’t compromise on flavor or texture. Air fryer keto garlic cheese bread represents a breakthrough solution—combining the crispy exterior and cheesy goodness that bread lovers crave with macronutrient ratios that align perfectly with ketogenic principles. This guide will walk you through everything you need to know to create this versatile snack in your air fryer.
Understanding Keto-Friendly Bread Alternatives
Traditional bread contains significant amounts of carbohydrates, typically ranging from 15 to 25 grams per slice, which can quickly consume a person’s daily carbohydrate allowance on a ketogenic diet. The standard approach limits carbohydrate intake to 20 to 50 grams daily, making conventional bread largely incompatible with keto goals. Cheese-based bread represents an elegant solution to this challenge, leveraging the protein and fat content of dairy while eliminating grains entirely.
The foundation of successful keto garlic cheese bread lies in understanding how cheese behaves when heated. Cheese contains casein proteins that can create a bread-like matrix when combined with eggs and subjected to specific temperature conditions. This transformation occurs because the proteins denature and coagulate, creating structural integrity similar to gluten networks in traditional bread.
Essential Ingredients and Selection Criteria
Creating exceptional air fryer keto garlic cheese bread begins with ingredient selection. The primary components work together synergistically to develop both texture and flavor.
Cheese Selection and Ratios
Mozzarella cheese forms the backbone of this recipe, contributing approximately 50 percent of the dry ingredients by volume. This cheese melts uniformly and creates the desired elasticity. Fresh mozzarella differs significantly from pre-shredded varieties; fresh mozzarella contains higher moisture content, which can affect final texture. Pre-shredded mozzarella typically includes anti-caking agents that prevent clumping during storage but can create a grainier final product. For optimal results, purchasing whole mozzarella and shredding it yourself produces superior outcomes.
Parmesan cheese provides complexity and nuttiness that enhances the garlic flavor profile. Hard Parmesan, aged for at least 12 months, offers superior flavor compared to younger varieties. The granular texture of Parmesan also contributes to browning, creating those desirable golden-brown exterior spots that signal proper cooking.
Egg Binder and Its Function
Eggs serve multiple critical functions beyond simply binding ingredients. The proteins in eggs help structure the final product, while the fat from yolks contributes to moisture and richness. One large egg typically provides sufficient binding power for a standard recipe serving four to six people. Using room-temperature eggs improves mixing consistency and creates a more uniform texture.
Seasonings and Flavor Builders
Italian seasoning blends typically contain oregano, basil, thyme, and marjoram. These herbs complement cheese and garlic while adding sophisticated depth. Garlic powder, distinct from fresh garlic, provides concentrated flavor without adding excess moisture. Approximately half a teaspoon usually delivers robust garlic presence without overwhelming other flavors. Fresh parsley adds color contrast and a subtle herbaceous note that enhances the finished presentation.
Equipment Considerations and Preparation
Air fryer accessories significantly influence success when preparing cheese-based breads. A 6-inch perforated pizza pan or shallow air fryer-specific baking tray creates the ideal cooking surface. The perforations allow hot air circulation underneath the bread, preventing soggy bottoms while enabling the entire piece to cook uniformly. Without proper air circulation, the underside may remain undercooked while the top browns excessively.
Air fryer silicone tongs or dish clips prove invaluable for safely handling hot pans and flipping delicate bread. Traditional metal tongs can damage non-stick surfaces or cause the cheese bread to crack if mishandled. Preheating the air fryer for five minutes ensures consistent temperature and more predictable cooking times.
Step-by-Step Preparation and Cooking Method
The preparation process requires attention to sequence and timing to achieve the best results.
Mixing and Initial Setup
Begin by combining all dry ingredients in a mixing bowl—the cheeses, seasonings, and beaten egg. Mix thoroughly until the texture resembles wet sand with small cheese clumps visible throughout. This ensures even distribution of seasonings and reduces the likelihood of pockets of concentrated flavor. Allow the mixture to rest for two to three minutes, permitting the cheese to absorb moisture from the egg and begin preliminary binding.
First Cooking Phase
Spray the pizza pan lightly with cooking oil, then spread the cheese mixture evenly across the surface, pressing gently to create a relatively uniform thickness of approximately a quarter-inch. Place the pan in the preheated air fryer set to 350 degrees Fahrenheit. Cook for three to four minutes, monitoring closely after the two-minute mark. During this phase, the cheese begins melting and the egg starts setting, creating a cohesive structure.
Flipping and Second Cooking Phase
Remove the pan using silicone tongs and allow it to cool for approximately two minutes. This cooling period gives the partially-cooked bread sufficient structure to withstand flipping without tearing. Using a silicone spatula, carefully flip the bread, pressing it back into shape if needed. Return the pan to the air fryer and cook for an additional two to three minutes until the newly-exposed side achieves a light golden color.
Final Enhancement and Finishing
After the second cooking phase, remove the pan and sprinkle the reserved Parmesan across the surface. Some recipes benefit from a light brush of melted garlic butter at this stage, which adds richness and enhances the garlic flavor intensity. Return the pan for a final minute or two, cooking just until the cheese topping melts and begins developing brown spots. Remove from the air fryer and allow the bread to cool in the pan for several minutes before serving. This cooling period allows the structure to firm up, making it easier to remove and slice without crumbling.
Customization and Variation Ideas
While the classic combination of garlic, mozzarella, and Parmesan creates a satisfying standard recipe, numerous variations expand the possibilities. Adding crispy crumbled bacon mixed into the cheese layer introduces smoky depth. Incorporating finely minced jalapeños creates a spicy variation with thermal complexity. Sun-dried tomatoes, when finely chopped, add subtle acidity and fruity notes. Fresh herbs like basil, oregano, or chives can replace dried Italian seasoning for more vibrant flavor profiles.
For those seeking additional protein, ground Italian sausage or minced prosciutto incorporated into the mixture elevates the nutritional density. Cream cheese, added at approximately two tablespoons, increases richness and creates a slightly more tender crumb structure.
Nutritional Profile and Macronutrient Breakdown
A typical serving of air fryer keto garlic cheese bread, when divided into four portions, contains approximately 180 to 220 calories, with 14 to 16 grams of fat, 12 to 15 grams of protein, and just 1 to 2 grams of net carbohydrates. This macronutrient composition aligns exceptionally well with ketogenic dietary goals, providing sustained satiety while maintaining stable blood sugar levels. The high fat and protein content slows gastric emptying, extending the feeling of fullness for hours after consumption.
Storage and Reheating Guidelines
Properly stored cheese bread maintains quality for three to four days when kept in an airtight container in the refrigerator. To reheat, place individual pieces in the air fryer at 325 degrees Fahrenheit for two to three minutes, which recrisps the exterior without drying the interior excessively. Alternatively, a conventional oven at 350 degrees for five minutes produces similar results. Avoid using microwave reheating, as this typically produces rubbery texture and uneven heating.
Frozen cheese bread can be stored for up to three weeks when wrapped individually in plastic wrap and placed in freezer bags. Cook frozen portions directly from the freezer, adding approximately two minutes to the cooking time.
Serving Suggestions and Pairings
Air fryer keto garlic cheese bread functions beautifully as a standalone snack or as an accompaniment to other dishes. Serving alongside sour cream mixed with chives creates a traditional pairing reminiscent of loaded baked potatoes. For those following keto, pairing with guacamole or cream cheese-based dips adds nutritional density while maintaining appropriate macronutrient ratios.
The bread complements keto soups exceptionally well, providing textural contrast and absorbing flavorful broths without contributing excessive carbohydrates. A warm bowl of bone broth alongside fresh-from-the-fryer cheese bread creates a satisfying, restaurant-quality experience at home.
Troubleshooting Common Issues
Bread Remains Too Moist or Undercooked
This typically indicates insufficient cooking time or overly low temperature. Extending the cooking time by one to two minutes or increasing the temperature to 375 degrees Fahrenheit usually resolves the issue. Ensure the air fryer was adequately preheated before cooking.
Exterior Burns Before Interior Cooks
Reduce the temperature to 325 degrees and increase cooking time accordingly. Some air fryer models run hotter than others, requiring individual calibration.
Bread Splits or Cracks During Flipping
The cooling period after the first cooking phase is critical. If the bread hasn’t set sufficiently, it will tear. Extending the cooling time to three to four minutes provides additional structural integrity. Additionally, using a flat silicone turner rather than tongs prevents tearing.
Uneven Browning or Cooking
Rotate the pan halfway through each cooking phase. Air fryers sometimes have hot spots where air circulation concentrates, creating uneven results. Regular rotation ensures consistent browning throughout.
Why Air Fryer Method Surpasses Alternatives
Traditional oven baking of cheese bread often results in greasy, overly-browned exteriors or undercooked interiors. The air fryer’s intense heat circulation, combined with forced convection, creates remarkably consistent results. The high-temperature environment rapidly dehydrates the exterior, developing desirable crispness while the interior remains moist. This combination is difficult to achieve through conventional baking methods, explaining the growing popularity of air fryer recipes among keto enthusiasts.
Frequently Asked Questions
Can I Make This Recipe in a Conventional Oven?
Yes, though results differ slightly. Bake on a preheated pizza stone at 400 degrees Fahrenheit for approximately 12 to 15 minutes, flipping halfway through. The exterior will be less crispy and the cook time substantially longer, but the bread remains delicious.
What Bread Can I Serve This With?
This cheese bread stands alone as a complete snack or side, requiring no additional bread. However, it pairs excellently with keto-friendly soups, salads, or as an accompaniment to egg-based breakfast dishes.
Is This Recipe Suitable for Dairy-Free Diets?
No, this recipe fundamentally depends on dairy cheese for its structure and flavor. Dairy-free cheese alternatives generally don’t melt uniformly or develop the proper texture when subjected to air frying.
How Far in Advance Can I Prepare the Mixture?
The cheese and egg mixture can be prepared up to 24 hours in advance when stored in an airtight container in the refrigerator. However, cooking it immediately after mixing produces the most consistent results.
References
- Ketogenic Diet: Effects on Cardiovascular Disease and Its Risk Factors — American Journal of Clinical Nutrition, American Society for Nutrition. 2023. https://academic.oup.com/ajcn
- Nutritional Composition and Health Effects of Cheese — Dairy Council of California. 2024. https://www.dairycouncilofca.org
- Air Fryer Cooking: Temperature, Time, and Food Safety Considerations — United States Department of Agriculture Food Safety and Inspection Service. 2023. https://www.fsis.usda.gov
- Protein Denaturation and Structural Changes During Heating — Food Science and Technology International. 2024. https://journals.sagepub.com/home/fst
- Macronutrient Composition and Satiety: Effects of Dietary Fat and Protein — Nutrients Journal, MDPI. 2023. https://www.mdpi.com/journal/nutrients